Custom Editing Control for UITableViewCell , like iPhone Mail Appliation
Dear Friends,
Today, while I was developing a application, I found that I am in need to a custom Editing control. Custom Editing Control are displayed on the left side of the screen. IOS sdk provides two of such kind which we use most of the time UITableViewCellEditingStyleDelete & UITableViewCellEditingStyleInsert .
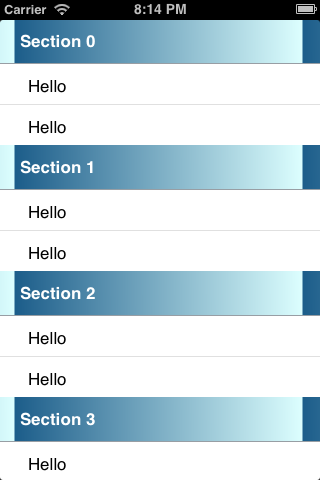
I will be now discussing the third one, UITableViewCellEditingStyleNone. This can be used to design our own Editing control. How this is going to look like can be fond from below screen shot.

Today, while I was developing a application, I found that I am in need to a custom Editing control. Custom Editing Control are displayed on the left side of the screen. IOS sdk provides two of such kind which we use most of the time UITableViewCellEditingStyleDelete & UITableViewCellEditingStyleInsert .
I will be now discussing the third one, UITableViewCellEditingStyleNone. This can be used to design our own Editing control. How this is going to look like can be fond from below screen shot.
Steps to achieve this can be found below:
STEP 1: Create A subclass of UITabelViewCell
First create a subclass of UITableViewCell, where when the cell object is initialised we will have to add a UIButton to its view.
You will also need a offset variable, whose value will be 32.0 in all iPhones.
-(id) initWithCoder:(NSCoder *)aDecoder{
self=[super initWithCoder:aDecoder];
if(self){
offset=32.0;
btn=[[UIButton alloc] initWithFrame:CGRectMake(-(offset/2.0)-(25.0/2.0), (self.contentView.frame.size.height/2.0)-(25/2.0), 25 , 25)];
[btn setImage:[UIImage imageNamed:@"off"] forState:UIControlStateNormal];
[btn setImage:[UIImage imageNamed:@"on"] forState:UIControlStateSelected];
[btn addTarget:self action:@selector(buttonSelected:) forControlEvents:UIControlEventTouchUpInside];
[btn setAdjustsImageWhenHighlighted:NO];
[self addSubview:btn];
}
return self;
}
In the above code you will see I have set image for Normal and selected state. Also, AdjustingImage when highlighted has been turned off, to get similar effect of controls provided by IOS sdk(Insert and Delete).
After this you will need to change the button frame when it starts editing. So this can be done in layoutSubviews method as listed below
-(void) layoutSubviews{
[super layoutSubviews];
if(self.isEditing){
btn.frame=CGRectMake((offset/2.0)-(25.0/2.0), (self.contentView.frame.size.height/2.0)-(25/2.0), 25 , 25);
}else{
btn.frame=CGRectMake(-(offset/2.0)-(25/2.0), (self.contentView.frame.size.height/2.0)-(25/2.0), 25 , 25);
}
}
Since, we have a button click event, so that is captured in a buttonSelected: method.So if its selected a checkmark Image will appear other wise a gray shaded image.
-(void) buttonSelected:(UIButton*) sender{
[sender setSelected:!sender.isSelected];
}
STEP 2: Make table enter in editing mode.
In the controller, I have added a "Edit" bar button to the top right side. When it is clicked you only need to put the table in editing mode, with UITableView editing style as none.
-(UITableViewCellEditingStyle) tableView:(UITableView *)tableView editingStyleForRowAtIndexPath:(NSIndexPath *)indexPath{
return UITableViewCellEditingStyleNone;
}
//Table enters in Editing Mode
-(IBAction) editTable:(id) sender{
[self.table setEditing:!self.table.editing animated:YES];
}
That's it you have created your own custom control.
Where do I go from here?
You can have a delegate called from buttonSelected: method in UITableViewCell method. This delegate will be implemented by your UIViewController.
This can save the state of the cells , which are clicked. Saving the state is necessary since we are reusing the cells in a UITableView. So in your cellForRowAtIndexPath: you can set the state of the cells.
After having the above thing, you can have a Delete button in the NavBar , to left most side, to delete multiple entries from a UITableView in edit-mode.


Comments
Post a Comment