UITestCase Automation Testing with Xcode
UITestCase using Xcode
TestCases for UI helps to automate the testing. In case of iOS , it is subclass of XCTestCase , which is part of XCTest framework.
The subclassed object can be usually considered a Test Suite. A Test Suite is nothing but a group of similar test classes intended to test a specific behavior.
To understand more about the automation testing using Xcode , we will consider a simple example which will test the alert message being shown appropriately or not for each button being tapped.
The code is available on GitHub.
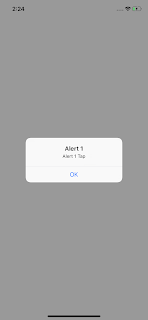
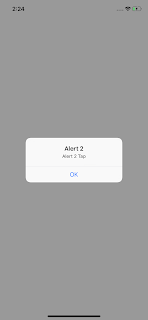
XCTestCase and life cycle of a test suite
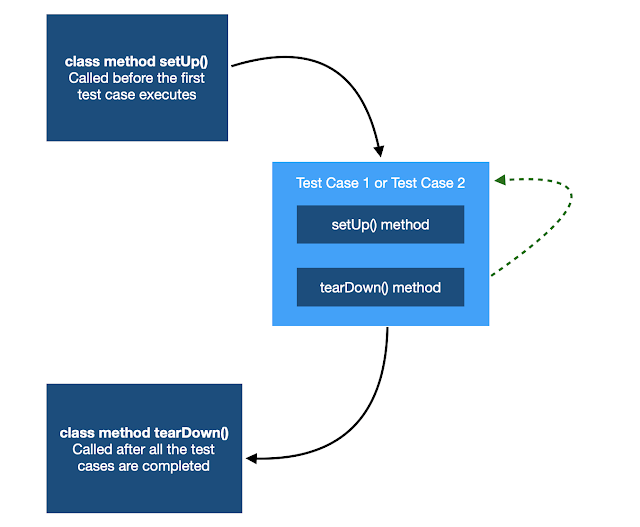
XCTestCase subclass objects has all the required methods to setup and run a test case. More precisely methods for test suite life cycle.a) class method setUp -> use this to initialize the inputs required , before the first test case executes.
override class func setUp(){
}
b) method setUp -> executed every time before a test case runs
override func setUp() {
}
c) method tearDown -> executed every time after a test case execution completes.
override func tearDown() {
}
d) class method tearDown() -> use this method to do a clean up after all test cases are executed.
override class func tearDown(){
}
e) tearDown blocks -> These blocks are executed after the method execution of a test case is completed and before a tearDown() method is called. It can be used to close alert which is shown during the test case execution . You will be able to find this in the test case code which is shared.
Making your code ready for UITestCases
Let's learn something about accessibility identifiers here and how they are use full for testing.
accessibility
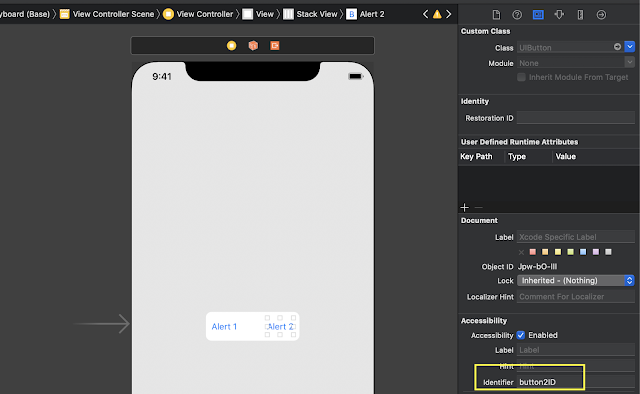
ex: app.buttons["button2ID"].tap()
Here we are trying to get the button which has accessibilityIdentifier as "button2ID". This can be set from Identity Inspector as shown below.
Adding a new UI Test Target
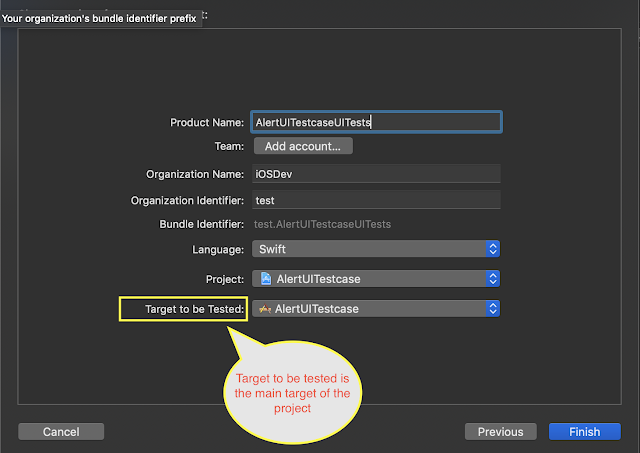
In case you have existing project for which you want to a UITestCases. Go to Test Navigator -> New UI .
 |
| Add new UI Test Target for your project from the Test Navigator. |
1) Get the UIApplication Proxy object using XCUIApplication(). This is required to query elements.
2) Now we want to tap the button with accessibility identifier "button1ID". Once we have the UIButton we wan a tap even so the code written in the main target shows the alert using UIAlertController.
3) Now as the XCUIApplication object "app" variable, is subclass of XCUIElement which in turn implements protocol XCUIElementTypeQueryProvider we can query for button or alerts and the static texts in the interface using a string identifier.
In the current scenario we are looking to Assert the alert has message "Alert 1 Tap", referenced by AlertUIMessageConstants.alert1Message.
If the message displayed matches the existence of the text then the test case is success or else it will be false.
4) addTeardownBlock , this is the place where we want to clean up what is being tested, For us it's as simple as dismissing alert by tapping ok.
Validating the test cases with code coverage (Enable Code Coverage)
Once we run all the test cases in the code finally, we can check the how much code is covered under our test case.
To enable Code Coverage we will have to enable it from Schema.
To enable Code Coverage we will have to enable it from Schema.
If we just have func testAlert1TapMessage(){ it will cover around 86.4 % of the code of ViewController.swift. In the below example we can simple disabling the test case for "Alert 2" button , reduces the code coverage. Which means some part of our code is not yet tested with automation script.
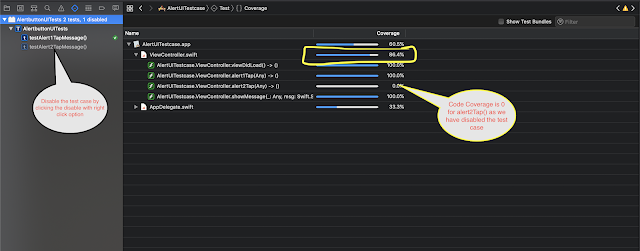 |
"Alert 2" button test case is disabled , which checks message being displayed for other button is correct or not |
As this was just for testing, let's re-enable and check the test case coverage report again.



Comments
Post a Comment