Posts

Swift - Optional Protocol Implementation
Image
In my previous blog, I explained the Protocol and optional protocol in a generic way. Now, we will dive deep into Protocol implementation and may be this is how the UITableViewDataSource and UITableViewDelegate would have been implemented. Objective's of this document would be to understand the optional protocol following concepts 1) Check implementation of the optional method by writing ? , after the name of the method. 2) When a method is optional it's type automatically becomes as optional. example type (Int) -> String becomes (Int) -> String? _________________________________________________________________________________ Lets start with a controller implementation , listed in the below code. There will no UI re-presentation , the protocol explanation is solely for simple understanding. 1)  ProfileViewsDelegate.swift. We will be implementing the protocol for the ProfileViews.swift. import Foundation import UIKit @objc protocol Profile...
Swift Protocol and Implementation

Image
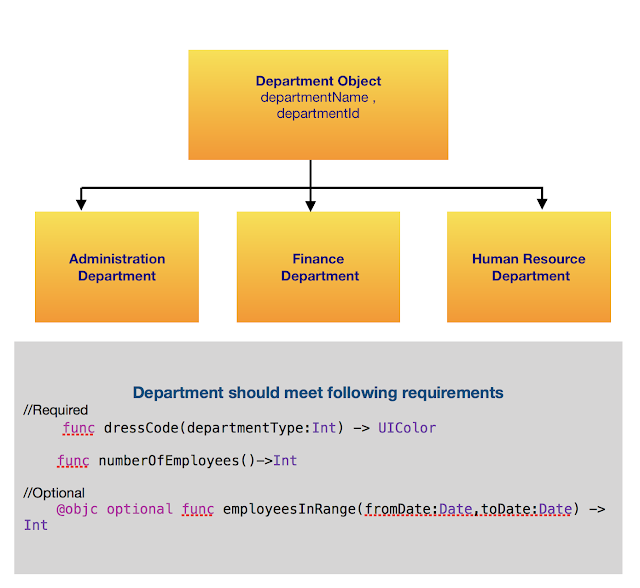
Protocols in Swift , define requirements that has to be implemented by a Class adopting or conforming to it. Protocols can be adopted by a Class , Structure or Enumeration , all of which can actually implement them based on the requirements. But, in one scenario you can't adopt protocol for Structure and Enumeration. Please go through the entire article for further understanding. Lets consider a simple example with Inheritance and Requirement (Protocol defines Requirements). Object Inheritance. Department Object is inherited by Administration , Finance and Human Resource Department. So all the departments will have inherited properties like departmentName and departmentId. Protocol. Protocol define the requirements. These requirements can be required or optional.  requirements If you notice in the design listed below, you will notice two type's for requirements. 1) Required  func dressCode(departmentType: Int ) -> UIColor func number...

How to set Status Bar in iOS?

Image
Setting the  UIStatus Bar Style   is very simple in iOS. Below is how it looks like with lightContent Style and the Default Style. Based on the app. UIView backgroundColor, you can set the way a status bar should appear. There are two ways to achieve this. The first one being the recommended one since iOS 7. For this one would have to make changes in Info.plist. 1) In iOS 7 onwards, you can specify the bar style per view controller. For this the value for Key UIViewControllerBasedStatusBarAppearance in info.plist should be set to YES . Now in your controller you should override a property  preferredStatusBarStyle  as coded below.     override var preferredStatusBarStyle: UIStatusBarStyle {         get {             return . lightContent         }      } Changing the return to .default will give you dark status bar style. ...

Swift Class versus Structure

In Swift Just like classes play a important role , Structure do play a important role. What could be the notable difference? First one is Structure is pass by value and Classes are pass by reference.  Below is a simple example to understand the meaning of it. func getAddress( _ object: Any )-> String {     var newObject = object     var address: String = String ( "Could Not CalculateAddress" )     withUnsafePointer (to: &newObject) {                  address = " \ ( $0 )"     }     return address } func getAddressForClass( _ object: AnyObject ) -> Any {     return Unmanaged < AnyObject >. passUnretained (object). toOpaque () } //Structure struct User{     var name: String     var userId: Int } func changeStructuredValue( _ inputStruct: User ){     var newI...

CMTimeMakeWithSeconds explained

Image
CMTime  is structure which has two main components,  timeScale  and  value. CMTIME = VALUE  / TIMESCALE where, TimeScale =  fraction of a second each unit in numerator occupies. CMTIME = Value / TimeScale 1)  public   func  CMTimeMake( _  value:  Int64 ,  _  timescale:  Int32 ) ->  CMTime CMTimeMake ( 6000 ,  10 ) Means, there are 6000 units , each unit occupies 1/10 of a second 2)  public   func  CMTimeMakeWithSeconds( _  seconds:  Float64 ,  _  preferredTimescale:  Int32 ) ->  CMTime CMTimeMakeWithSeconds(10.0,500) 10.0 = VALUE /500 Therefore VALUE = 5000 So, there are 5000 units, each occupy 1/500 of a second

UILabel dynamic height with Autolayout

Image
Adding a UILabel to UIScrollView and with a couple of lines of code you would be able to achieve the dynamic height. But, there is one more way and thats without writing a single line of code. So, lets get started on it. Approach 1: Mistakes that we would make is explained below. (UILabel and UIScrollView) Add a UIScrollView , set top, left, bottom, right margin set to 0 against superview as per your requirement. Add the UILabel and we do the same for UILabel (top,left,bottom,right margin set to 0 with respect to SuperView, which is UIScrollView ) With this approach scrollview would not get idea on the scroll limits. It will set the content size, where it would scroll horizontally. You can still go with this approach. Explained in conclusion. Approach 2: Now, lets go with the correct way to Code .  It includes the following hierarchy UIView -> UIScrollView -> UILabel. Step 1  : Add the UIView , set the margin according. Here I ...

Can we animate "shadowOpacity" using UIView animation block?

We are pretty much used to the UIView animation block for properties like frame and transforms. + ( void )animateWithDuration:( NSTimeInterval )duration animations:( void (^)( void ))animations Lets say there is a UIView *userView and you would like to show animation of shadow turned on or off.     [ UIView animateWithDuration :01 animations :^{         if (showShadow){             self.userView. layer . shadowOpacity =0.5;         } else {             self.userView. layer . shadowOpacity =0.0;         }     }]; The above code is not going to work. UIView animates  frame, bounds, center, tranform, alpha, background Color and contentStretch.i.e simple animation. The View Programming guide - Animations  url gives more details on it.  It does not animate layer properties...

UITableView with Keyboard handling for UITextFields

UITableView has its parent class as UIScrollView. So, if you have a UITableViewCell , which has UITextField, then it needs to handle the contentOffset. More details on contentOffset  ( another url )and keyboard handling   in iOS. Lets say if we want to add a bottom inset of 216 (approx. kyeboard height). the following would be the code You basically change the content Offset while the content size remains the same. self.contentOffset = UIEdgeInset(0,0,216,0). This will move the content ( in the UITableView) up by 216. The below code also handles autosuggestion bar ,  as the autosuggestion delta (approx. 29) gets added to existing delta. And Removes it accordingly. -( void )viewWillAppear:( BOOL )animated{     [ super viewWillAppear :animated];     [ self   registerNotifications: YES ]; } -( void )viewWillDisappear:( BOOL )animated{     [ super viewWillDisappear :animated];     [ self   regis...

Change height of the UISegmentedControl

Image
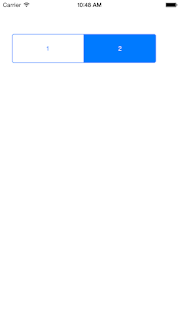
UISegmentedControl changing height is sometimes difficult to find. It can be easily done if you are using constraints. In case if you don't use constraints , I tried the following approach which I though would work, but actually it did not. - ( void )viewDidLoad {     [ super viewDidLoad ];      CGRect rect= self . seg_cntrl . frame ;     rect. size . height =60.0;     [ self . mySegmentControl setFrame :rect]; } Later on I found if you try to create a UISegmentedControl object using a code and then set the Frame it  will consider the height that you set. - ( void )viewDidLoad {     [ super viewDidLoad ];          UISegmentedControl *seg=[[ UISegmentedControl alloc ] initWithItems :@[ @"1" , @"2" ]]     ;     [seg setFrame : CGRectMake (25.0, 70.0, 300.0, 60.0)];     [ self . view addSubview :seg]; } The r...

How to set Custom Section Header in UITableView for ios sdk version greater than 6

Image
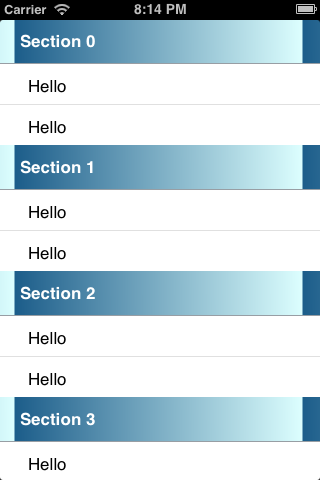
Dear Friends, As we know, that to set a custom Section Header in a TableView we need to call the following. Here we pass our own custom View. But, remember the view which we returned was never reusable, hence not memory efficient. -( UIView *) tableView:( UITableView *)tableView viewForHeaderInSection:( NSInteger )section Later version of iOS , starting from iOS 6, helps to make our code Memory efficient with few lines of code. Still here the delegate method remains the same. With the help of this tutorial we will be able achieve a Custom Header implementation using iOS 6 or greater sdk. We will be creating a app. which would look like as shown below. Please use the following steps to achieve this: Step 1: Create a .xib file for the custom header 1. Press command + N 2. Select User Interface in Left Pane. 3. Then Select a View and name it as TableHeader. Step 2: Create a Custom class for the custom header in Step 1 1. Press command...